WoW: Forever
Dungeons & Loot
Every dungeon and every boss drop, straight from the WoW: Forever database. Hover any item for its Forever stats.
Ragefire Chasm
Level 13-18 · 4 bosses · 13 drops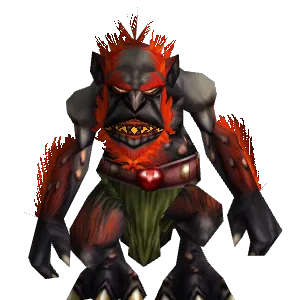
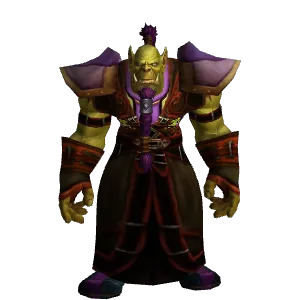
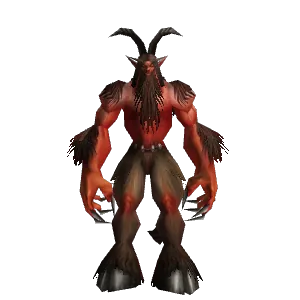
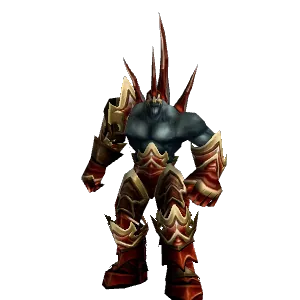
Dungeon · Orgrimmar
Ragefire Chasm
Ragefire Chasm is a fiery cavern complex found deep beneath the city of Orgrimmar, serving as an introductory dungeon experience. Your party will battle through troggs and the fanatical Searing Blade cultists in a straightforward loop, ending with a confrontation against a massive fire elemental.
Getting there
- From Orgrimmar's main gate, proceed north through the Valley of Strength and The Drag.
- Locate the large, shadowed cave entrance to the Cleft of Shadow on the western side of The Drag.
- Enter the Cleft of Shadow and follow the path downwards.
- The swirling, red instance portal is at the bottom of the ramp.
Entrance on the map
Before you enter
- ›Bring a group of 4-5 players, ideally between levels 13 and 18.
- ›The final boss has a fire nova; melee classes should be prepared to step out of it.
- ›Gather quests from Orgrimmar, Undercity, and Thunder Bluff before entering.
- ›This is a short instance; expect a run time of 30-45 minutes.
Requirements
- No key or attunement needed.
Retrieve the Searing Blade from the cultist leader Bazzalan.
Start: Neeru Fireblade — Cleft of Shadow, Orgrimmar
Chain: Part of a chain that starts with Thrall in the Valley of Wisdom.
Defeat Taragaman the Hungerer, the final boss of the instance.
Start: Grezz — Cleft of Shadow, Orgrimmar
Kill 10 Ragefire Troggs and 10 Ragefire Shamans inside the Chasm.
Start: Rahauro — Elder Rise, Thunder Bluff
Start the quest from the dropped item and take it to Rahauro in Thunder Bluff.
Start: Gorkas's Lost Satchel — Drops from Searing Blade cultists within the instance.
Chain: This drop begins a short quest chain.
◇ Starts from a dropped item — no map pin
Slay Jergosh the Invoker and Bazzalan to claim their hearts.
Start: Varimathras — Royal Quarter, Undercity
Chain: Warlock-only class quest to obtain the Felhunter pet.
Oggleflint
<Ragefire Chieftain>How to beat it
This is a simple tank and spank with two adds. Crowd control one add if possible, kill the other, then burn the boss. Watch for pulling additional troggs in the area.
Who's in the fight
- ◆Ragefire Trogg — Two non-elite adds that flank the boss. They hit for minor damage and can be crowd controlled or quickly killed.
⚠ Wipe risk: Pulling additional trogg packs from the surrounding area by accident.
🛡️ Tank
- ›Engage and generate threat on Oggleflint (Skull) and his two guards.
- ›Focus threat on Oggleflint. He is the only real threat.
- ›Position the mobs away from other packs to prevent accidental pulls.
- ›Use any abilities you have to reduce incoming damage.
💚 Healer
- ›The tank will take moderate damage from three mobs at the start of the pull.
- ›Keep the tank's health high, as damage is constant melee.
- ›Be prepared to heal any DPS who pulls aggro from an add.
- ›Once the adds are down, damage becomes predictable and low.
⚔️ DPS
- ›If you have crowd control, use it on one add (Moon).
- ›Focus damage on the primary add (X), then switch to the boss (Skull).
- ›Let the tank establish threat before you use high-damage abilities.
- ›This is a straightforward fight, burn the targets in the correct order.
Gear drops · 3 items
One piece of gear drops per kill — percentages show your odds of each piece and add up to 100%.

Barbaric Crossbow
Ranged · iLvl 18

Bone Knuckles
Main Hand · iLvl 18

Trogg Scepter
Main Hand · iLvl 18
Jergosh the Invoker
How to beat it
Jergosh is a caster boss with two caster adds. Pull the group out of the room and line-of-sight them to stack them up. Interrupt key spells and kill the adds first.
Who's in the fight
- ◆Searing Blade Cultist — Two casters that cast Firebolt. Kill these first as their damage adds up.
⚠ Wipe risk: Allowing all three mobs to free-cast Firebolts onto the tank will cause a wipe.
🛡️ Tank
- ›Use a ranged attack to pull the group, then pull them back around a corner to group them up (Line of Sight).
- ›Interrupt Jergosh's 'Immolate' or 'Curse of Weakness' casts.
- ›Hold threat on all three targets. Mark adds Skull and X.
- ›Face mobs away from the group out of habit, though it is not critical here.
💚 Healer
- ›The tank will take heavy spike damage from multiple fire spells at the start.
- ›If you can remove curses, dispel 'Curse of Weakness' from the tank immediately.
- ›Stay near max range and around the corner to avoid pulling other patrols.
- ›Once the adds die, the fight becomes much easier to heal.
⚔️ DPS
- ›Kill the adds first. Focus Skull, then X.
- ›Interrupt Jergosh's casts whenever possible. Assign an interrupt rotation if needed.
- ›Classes with an interrupt can interrupt Jergosh. Classes with crowd control can use it on one of the adds.
- ›Use AoE abilities once the tank has grouped the mobs.
Gear drops · 3 items
One piece of gear drops per kill — percentages show your odds of each piece and add up to 100%.

Cavedweller Bracers
Wrist · Mail · iLvl 18

Chanting Blade
One-Hand · iLvl 18

Robe of Evocation
Chest · Cloth · iLvl 18
Bazzalan
How to beat it
Bazzalan is a patrolling demon that is a pure DPS race. He has no adds but will burn the healer's mana. Kill him as quickly as possible.
⚠ Wipe risk: The healer running out of mana from 'Mana Burn', leaving the group unable to be healed.
🛡️ Tank
- ›Pull the boss in a clear area, away from other patrols.
- ›This is a simple tank and spank. Build a strong threat lead early.
- ›There are no cleaves or special positioning requirements.
- ›Use your taunt immediately if a DPS or Healer gets aggro.
💚 Healer
- ›The boss will cast 'Mana Burn' on you. There is little you can do to avoid it.
- ›Conserve mana. Use your most efficient heals and avoid overhealing.
- ›The fight is a race against your mana bar. Tell your DPS to go all-out.
- ›He applies a poison DoT ('Poison Spit'). Heal through it unless someone in your group can remove poisons.
⚔️ DPS
- ›This is a pure burn fight. Use all your damage cooldowns.
- ›Watch your threat and do not pull aggro from the tank.
- ›Mana users may also be targeted by 'Mana Burn', so spend your mana efficiently.
- ›Kill the boss before the healer runs out of mana.
Gear drops · 3 items
One piece of gear drops per kill — percentages show your odds of each piece and add up to 100%.

Chasm Walkers
Feet · Leather · iLvl 18

Satyrskin Cloak
Back · iLvl 18

Searing Dagger
Main Hand · iLvl 18
Taragaman the Hungerer
How to beat it
The final boss is a large fire elemental. He does party-wide fire damage and has a knockback. Ranged should spread out and everyone should be prepared for consistent damage.
⚠ Wipe risk: The healer falling behind on group-wide damage from 'Fire Nova', especially if people are taking other avoidable damage.
🛡️ Tank
- ›Position the boss in the center of his circular platform.
- ›He hits hard. Be prepared to use defensive abilities.
- ›He has a knockback. Reposition and re-establish threat quickly.
- ›If available, use group-wide fire resistance buffs.
💚 Healer
- ›The entire party will take damage from his AoE 'Fire Nova'. Prioritize keeping the tank alive, then heal the DPS.
- ›Stay at max range to potentially avoid some damage, though the room is small.
- ›This is a mana-intensive fight due to constant group damage. Conserve where possible.
- ›The tank will be taking heavy melee damage on top of the fire damage.
⚔️ DPS
- ›Ranged DPS and Healers: Spread out around the boss to avoid being clumped up.
- ›Melee DPS: You will be hit by his 'Fire Shield' aura and 'Fire Nova'. Stay on the boss and trust the healer.
- ›Watch your threat. This is a longer fight and it's easy to pull aggro if you open up too fast.
- ›After the knockback, get back into position and continue damaging the boss.
Gear drops · 3 items
One piece of gear drops per kill — percentages show your odds of each piece and add up to 100%.

Crystalline Cuffs
Wrist · Cloth · iLvl 18

Cursed Felblade
Main Hand · iLvl 18
Subterranean Cape
Back · iLvl 18
Quest & bonus items
Rolled separately from the gear — chance per kill.

Taragaman the Hungerer's Heart
Quest / item